danbricklin.com/log
|
|
|
Back to Trellix and Blogging, Part 2
|
Trellix blogging screenshots
|
Here are some screenshots to show you how TWE blogging will work. They are based on alpha code running April 7, 2002. I've put up three pages: Initial setup, Adding new posts, and Changing the look of the web site.
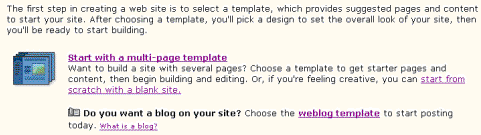
Initial setup
You create a web site by choosing a template. Here we'll click on "weblog template":
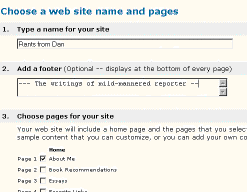
 You then type in the web site name and choose the pages you'd like to start with (you can add or delete pages later):
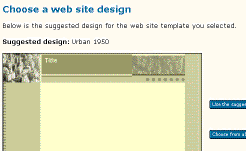
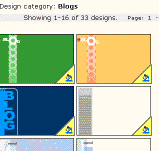
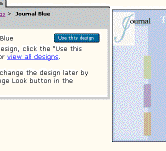
 Next you choose a design -- the "look" for your web site. Here we don't use the default one, but rather choose one from the design gallery:
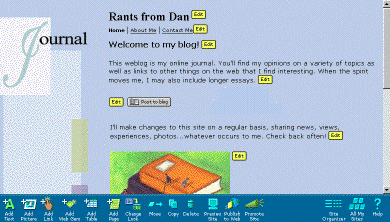
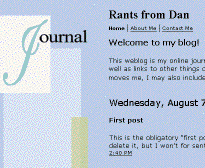
   This is the main editing screen. It shows a page of the web site. Links can be used to edit other pages, and the toolbar buttons at the bottom can be used to add new items (text, images, links, etc.) to the page and other operations. Items on the page can be changed by clicking the "Edit" buttons. Note that the web site is "publish ready" -- sample text is included to give you ideas, but it doesn't have to be changed:
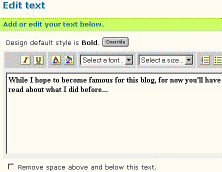
 After clicking the "Post to blog" button we are taken to a screen for entering the blog post. If you are running Windows Internet Explorer, you can use rich text editing:
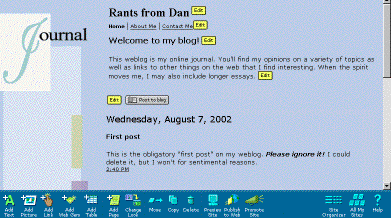
 After writing your post, you can press the "Done" button and return to the edit page. The blog part of the page is updated, complete with automatic date/time stamps, title, permanent links, and archive links:
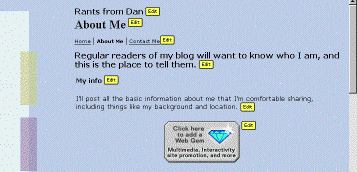
 To edit the "About Me" page, you click on the "About Me" link on the page navigation, and then edit items by using the "Edit" buttons and the toolbar:
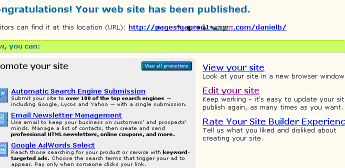
  To make your web site live, you press the "Publish to Web" toolbar button and then you get to the "Finished Publishing" page. You can then view your web site (the editing buttons will be gone...) or go back and edit some more:
  That's it for setting up your blog and web site. The next page shows you how to add additional posts. Go to Trellix blogging screenshots (cont.).
|
|
|
© Copyright 1999-2018 by Daniel Bricklin
All Rights Reserved.
|